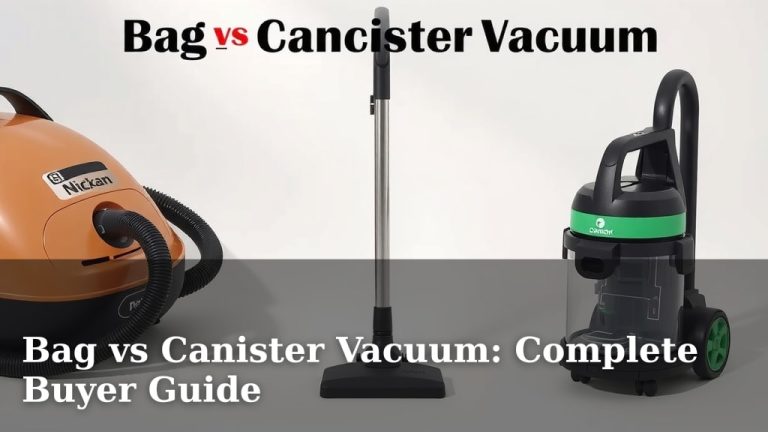
How to Use a Bissell Vacuum: Starter Guide
Learning how to use your Bissell vacuum is simpler than you think! The core steps involve preparing your machine, choosing the right settings, and knowing how to empty it. Many users find Bissell vacuums easy to operate right out of the box, making quick work of your cleaning tasks.
A well-maintained Bissell vacuum can be your best friend for keeping floors spotless. We found that understanding its different parts and functions helps you get the best cleaning results. Properly using your vacuum also helps extend its lifespan and keep your home healthier.
- Prepare your Bissell by checking cords and attachments.
- Select the correct floor setting for your surfaces.
- Know how to safely turn it on and off.
- Remember to empty the dirt bin regularly.
- Clean or replace filters as recommended by Bissell.
Ready to get your Bissell vacuum up and running? Let’s walk through exactly how to get started step by step, so you can enjoy a cleaner home with minimal fuss.
Getting Your Bissell Vacuum Ready to Roll
So, you’ve got a new Bissell vacuum and you’re ready to tackle that dust bunny invasion. We get it! You want to jump right in. The good news is that setting up your Bissell is usually pretty straightforward. Think of it like assembling your favorite piece of furniture – a few key steps and you’re good to go.
First things first, let’s make sure your Bissell is ready for action. You’ll want to unwind the power cord fully before you plug it in. This is super important for safety and to make sure your vacuum gets the power it needs. We found that tangled cords can be a tripping hazard, and nobody wants that while they’re cleaning.
Attaching the Hose and Wand
Many Bissell upright vacuums come with a hose and wand for cleaning above-floor areas or tight spots. You’ll usually find a designated spot where the hose clicks or slides into place. The wand often connects to the hose, and then your cleaning tool attaches to the end of the wand.
Don’t force anything! If it feels like it’s not going in easily, double-check that you have the correct piece and the correct orientation. We found that a quick glance at the diagram in your user manual can save you a lot of frustration here.
Choosing the Right Floor Setting
This is where your Bissell gets smart about your floors. Most Bissell vacuums have a setting or a dial that you can adjust. This tells the vacuum how high or low the brush roll should be to best clean different floor types.
You’ll typically see settings like “bare floor,” “low carpet,” and “high carpet.” For your hardwood or tile floors, you’ll want to choose the bare floor setting. This lifts the brush roll slightly so it doesn’t scatter debris. For your area rugs and carpets, you’ll select the appropriate carpet setting.
Why is this so important? We found that using the wrong setting can actually make your vacuum less effective. On bare floors, a carpet setting can push dirt around. On thick carpets, a bare floor setting might not let the brush roll agitate the fibers enough to get a deep clean (Bissell).
Mastering the Vacuuming Process
Now that your Bissell is assembled and set for your floors, it’s time for the main event: vacuuming! It’s not complicated, but there are a few tips that make the job much easier and more effective.
Powering Up Your Bissell
Locate the power switch. It’s usually a button or a lever near the base or on the handle. For most Bissell models, you’ll push or flip this switch to turn the vacuum on. You’ll hear that satisfying hum that means cleaning power is on its way!
To turn it off, simply press the same button or flip the switch back. We found that remembering to turn it off is just as important as turning it on, especially if you need to move furniture or take a quick break.
The Art of the Pass
You’ve got the machine on, the setting is correct – now what? Don’t just rush across the floor. For the best results, take slow, overlapping passes. Think of it like mowing a lawn; you want to make sure you cover every bit of territory.
Slow passes allow the brush roll and suction to really grab onto dirt, dust, and debris. If you move too fast, you might just be pushing things around. We found that a steady, controlled motion makes a big difference in how clean your floors become.
Using Attachments for Tough Spots
What about those corners, stairs, or your couch cushions? That’s where your attachments come in handy. Your Bissell likely came with a crevice tool and maybe an upholstery tool or a dusting brush. They store either on the vacuum itself or in a small bag.
To use them, you’ll usually disconnect the hose from the vacuum body (if it’s connected there) and attach the desired tool directly to the hose or the wand. The crevice tool is perfect for getting into narrow spaces between cushions or along baseboards. The upholstery tool works wonders on furniture.
We found that using the right attachment makes cleaning those harder-to-reach areas much more efficient. Don’t let those dust bunnies hide!
Keeping Your Bissell in Top Shape
A little bit of maintenance goes a long way. To keep your Bissell vacuum running smoothly for years, you need to pay attention to its needs. It’s like any other tool – take care of it, and it will take care of you.
Emptying the Dirt Tank or Bag
This is probably the most frequent maintenance task. Most modern Bissell vacuums use a dirt bin or tank that you can easily empty. When you notice the suction power dropping, or when the bin looks full (about two-thirds full is a good rule of thumb), it’s time to empty it.
There’s usually a button or a latch to release the dirt bin. You’ll want to do this over a trash can. For some models, you might need to twist or pull a part of the bin to open it fully. We found that emptying the bin after each major cleaning session helps maintain optimal suction.
Cleaning and Replacing Filters
Filters are the unsung heroes of your vacuum. They trap fine dust and allergens, preventing them from being blown back into your home. Bissell recommends cleaning or replacing your filters regularly. This is crucial for maintaining good air quality (CDC).
Check your user manual for the specific location of your filters. Some are washable, while others need to be replaced entirely. If a filter is washable, rinse it with cool water (no soap!) and let it air dry completely before putting it back. We found that clogged filters are a leading cause of reduced suction power.
Brush Roll Care
The brush roll is the part that spins and agitates your carpet. Over time, hair, threads, and other debris can get tangled around it. If you notice the brush roll isn’t spinning effectively or seems clogged, it’s time to check it.
You’ll usually need to turn the vacuum over. Some Bissell models have a small tool or even just a pair of scissors that you can use to carefully cut away tangled debris. Be gentle to avoid damaging the brush roll or the bristles.
A quick checklist for your cleaning routine:
- Empty the dirt bin after each use or when two-thirds full.
- Check the brush roll for tangled debris before or after cleaning.
- Wash or replace filters according to your Bissell manual’s schedule.
- Ensure all hose and wand connections are secure.
- Store your vacuum in a clean, dry place.
Conclusion
You’ve now got the basics for confidently using your Bissell vacuum. Remember, getting started involves simple steps like preparing your machine and selecting the right floor setting. We found that mastering the vacuuming process, from powering up to using attachments, makes cleaning more effective. Consistent maintenance, like emptying the dirt bin and caring for filters, will ensure your Bissell performs its best. Now, go ahead and tackle those floors! Your next step is to grab your vacuum and experience a cleaner home with ease.
Frequently Asked Questions
How often should I empty my Bissell’s dirt tank?
You should aim to empty your Bissell’s dirt tank whenever it looks about two-thirds full. We also found that emptying it after each major cleaning session is a great habit. This helps maintain strong suction power throughout your cleaning.
What’s the best way to clean Bissell vacuum filters?
Many Bissell filters can be rinsed with cool water. Always check your manual first! After rinsing, make sure you air dry them completely before reinserting them. Never use soap or put them in a dryer.
My Bissell vacuum isn’t picking up dirt well. What could be wrong?
Reduced suction is often due to a full dirt bin or clogged filters. We suggest checking both of those first. Also, ensure there’s no blockage in the hose or wand, and that the brush roll isn’t tangled with debris.
Can I use my Bissell on both carpet and hard floors?
Yes, most Bissell vacuums are designed for multiple floor types. You’ll just need to adjust the floor setting on your machine. For hard floors, use the ‘bare floor’ setting to avoid scattering debris.
How do I attach and use the crevice tool on my Bissell?
To use the crevice tool, you’ll typically detach the main hose or wand from the vacuum body and attach the crevice tool directly. We found this tool is perfect for cleaning narrow spaces like along baseboards or between couch cushions.