Anova Vacuum Sealer Pro: How to Use It Step by Step
Have you ever opened your freezer and found forgotten leftovers covered in freezer burn? Or maybe you’ve watched perfectly good food go bad because you couldn’t preserve it properly? The Anova Vacuum Sealer Pro is here to change that story for you. This isn’t just another kitchen gadget sitting in your drawer collecting dust—it’s a game-changer for anyone who wants to extend the life of their food while maintaining its quality.
The Anova Vacuum Sealer Pro combines sleek design with powerful functionality, making food preservation accessible to everyone. Whether you’re a meal-prep enthusiast, a busy parent, or someone who loves to cook in bulk, understanding how to use this device properly will transform the way you store and manage your food. Let’s walk through everything you need to know.
Getting to Know Your Vacuum Sealer: Components and Controls
The Main Housing and Sealing Strip
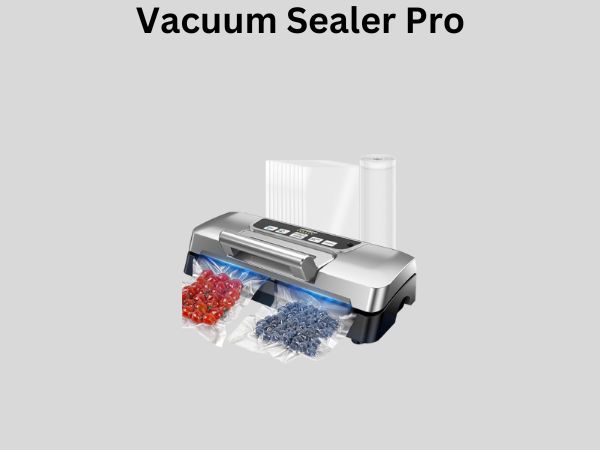
When you first unbox your Anova Vacuum Sealer Pro, you’ll notice it has a clean, minimalist design that fits nicely on most countertops. The main body houses the vacuum pump and heating element. The sealing strip runs horizontally across the top—this is where the magic happens. Think of it as the device’s heart, creating that airtight seal that keeps your food fresh.
The vacuum channel, located just below the sealing strip, is designed to work with special vacuum-seal bags. This channel guides the air out of your bag before the sealing strip locks everything in place. It’s a simple yet elegant system.
Control Panel and Button Functions
The control panel is straightforward and user-friendly. You’ll find several buttons that control different functions:
- Power Button: Turns the device on and off
- Seal Button: Initiates the standard sealing process
- Marinate Button: Activates the quick marinating mode
- Pulse Button: Provides gentle vacuuming for delicate items
Some models also include a vacuum-only mode for sealing pre-made containers. The buttons are responsive and provide clear feedback, so you’ll always know when an action has been registered.
Storage Compartments and Bag Storage
The Anova Vacuum Sealer Pro features a convenient bag storage compartment on the side or bottom of the unit. This keeps your vacuum-seal bags organized and easily accessible. You won’t be hunting through kitchen drawers anymore. The compartment is specifically designed to fit standard vacuum-seal bags, keeping them protected from damage.
Preparing Your Food and Bags for Success
Choosing the Right Bags
Not all bags are created equal when it comes to vacuum sealing. You’ll want to use bags specifically designed for vacuum sealing—these have the special vacuum channels we mentioned earlier. Regular zip-lock bags simply won’t work properly. The Anova brand offers compatible bags in various sizes, from quart-sized bags for smaller portions to gallon-sized bags for bulk items.
Consider what you’re sealing when choosing your bag size. A single chicken breast might fit perfectly in a quart bag, while marinating a large piece of meat might require a gallon bag. Having a variety of sizes on hand gives you flexibility for different sealing projects.
Food Preparation Tips
Before you seal anything, take a moment to prepare your food properly. Here’s what you should do:
- Pat dry any wet foods with paper towels—excess moisture can interfere with the seal
- Remove any sharp bones or points that might puncture the bag during vacuuming
- Allow hot foods to cool to room temperature before sealing
- Trim excess fat from meats to reduce the chance of bag punctures
- Arrange foods in a single layer when possible for even sealing and easier storage
Think of this preparation stage as setting yourself up for success. It only takes a few extra minutes, but it makes the sealing process smoother and ensures better long-term results.
Bag Positioning and Fill Levels
When filling your bag, don’t go all the way to the top. Leave at least two inches of empty space at the opening of the bag. This space is crucial—it gives the vacuum and sealing process room to work without any food interfering with the seal line. If you overfill the bag, the food might end up in the sealing strip, ruining both your meal and potentially damaging the device.
Position your food strategically. For liquids or marinades, lay the bag flat on the counter before filling. For solid items, arrange them so they’re not piled directly against the opening.
Step-by-Step Guide to Basic Sealing
Step One: Prepare and Power On
Start by placing your Anova Vacuum Sealer Pro on a clean, flat surface near an electrical outlet. This device needs stability to work properly. Once it’s positioned correctly, plug it in and press the power button. You’ll typically see a light indicate that the device is ready to use. Allow it about 30 seconds to fully initialize.
Step Two: Fill Your Bag
Take one of your vacuum-seal bags and fill it with your prepared food, remembering that two-inch rule we discussed. Don’t rush this step. Take your time arranging everything so it’s balanced and won’t shift during the vacuuming process.
Step Three: Open the Sealing Strip
Most Anova models have a lid or cover that lifts up to reveal the sealing strip. Gently lift this open until it clicks into the raised position. The sealing strip should be exposed and ready for action.
Step Four: Insert the Bag Opening
This is where precision matters. Take the open end of your filled bag and insert it into the vacuum channel at the top of the sealer. The bag opening should sit in that channel with the vacuum strip facing down. Make sure the bag is straight and centered—wrinkles or twists will prevent a proper seal.
Step Five: Press and Hold the Seal Button
Once your bag is positioned correctly, press the seal button. You’ll hear the vacuum pump engage immediately. It will begin removing the air from the bag, and you’ll actually see the bag collapse around your food. This is perfectly normal and exactly what should happen. The vacuuming process typically takes five to ten seconds, depending on the bag size and food amount.
Step Six: Release the Button and Wait
After the vacuum sound changes or stops, release the seal button. The device will now activate the heating element to seal the bag permanently. You’ll see the sealing strip glow slightly as it heats. This only takes a few seconds. When the seal is complete, the device will beep or signal that the process is finished.
Step Seven: Remove Your Sealed Bag
Once you hear the completion signal, carefully lift the sealing strip lid and remove your newly sealed bag. Be careful here—the sealing strip may still be warm. Let the bag cool for a moment before handling it. You should now have a perfectly sealed, vacuum-packed bag ready for storage.
Understanding the Marinate Function
One of the standout features of the Anova Vacuum Sealer Pro is its marinating mode. This function is absolutely brilliant if you love marinated meats or vegetables. Instead of waiting hours or overnight for flavors to penetrate, the marinating mode accomplishes the same result in minutes.
Here’s how it works: when you press the marinate button, the device performs quick vacuum pulses that draw marinade deep into your food. The process is gentler than regular vacuuming, so delicate foods won’t get damaged. It typically takes just two to three minutes to achieve what would normally take several hours through traditional marinating.
To use this function, fill your bag with your food and marinade, leaving that crucial two-inch space at the top. Insert the bag as you normally would, but this time press the marinate button instead of the seal button. The device will pulse the vacuum several times, drawing the marinade into your food. Once it’s complete, you’ll hear a signal indicating the marinating cycle is done. Your food is now ready to cook, or you can refrigerate it for later use.
Using the Pulse Feature for Delicate Foods
When and Why to Use Pulse Mode
Not everything benefits from aggressive vacuum sealing. Soft breads, fresh berries, delicate cheeses, and certain vegetables can get crushed if you use the standard sealing mode. This is where the pulse feature becomes your best friend.
Pulse mode gives you gentle, controlled vacuuming. Instead of one continuous vacuum action, it pulses the suction on and off rapidly. This allows you to remove air gradually without the force that would otherwise destroy your food’s structure and texture.
How to Activate Pulse Sealing
The process is nearly identical to standard sealing, but with one key difference. Fill your bag with your delicate food items as usual. Position the bag in the sealing channel just like you would for regular sealing. However, instead of pressing the seal button, you’ll press the pulse button instead.
Hold down the pulse button while watching your bag. You’ll see it compress gently, release slightly, compress again, and so on. This rhythmic action is exactly what you want. You’re in control here—hold the button as long as you need until enough air has been removed. Once you’re satisfied, release the button, and the device will activate the sealing strip to lock in your work.
The beauty of pulse mode is that you can see the progress in real-time and adjust accordingly. If your berries are getting crushed, release the button. If you want a little more vacuum, keep holding. It’s intuitive once you understand the principle.
Maintenance and Cleaning Your Device
Daily Care Practices
Keeping your Anova Vacuum Sealer Pro in top shape is straightforward. After each use, unplug the device and allow it to cool completely. This typically takes about five to ten minutes. Once it’s cool, take a soft, damp cloth and wipe down the exterior surfaces. Don’t use harsh chemicals or abrasive materials—you’ll damage the finish.
Check the vacuum channel for any food debris or spills. If you spot anything, use a soft brush or cloth to gently remove it. A clean channel ensures optimal vacuum performance. If there’s any liquid spill, use a slightly damp cloth to clean it out.
Maintaining the Sealing Strip
The sealing strip is the heart of your device, so treat it with respect. Never touch it directly with your fingers, and never attempt to clean it with water or liquids. If you notice any residue on the sealing strip, allow the device to cool completely, then use a dry cloth or soft brush to gently remove it. Some users recommend occasionally wiping the sealing strip with a dry cloth between uses to keep it pristine.
Checking Gaskets and Seals
Over time, the rubber gaskets and seals that keep everything working properly can degrade slightly. Periodically inspect these components for cracks or signs of wear. If you notice anything amiss, contact Anova’s customer service—replacement parts are readily available and affordable. Replacing these parts early prevents bigger problems down the road.
Storage Between Uses
When you’re not using your vacuum sealer, store it in a cool, dry place. Make sure the sealing strip lid is in the closed position to protect the heating element from dust. If your device came with a storage cover, use it. Proper storage extends the life of your device and ensures it’s ready to go whenever you need it.
Common Mistakes You Should Avoid
Overfilling Your Bags
This is the number one mistake most people make. They think they’re being efficient by filling bags to the brim, but overfilling compromises the seal. Food particles end up in the sealing strip, preventing a proper seal. Always leave that two-inch clearance at the top of the bag.
Sealing Wet Foods Without Preparation
Moisture is the enemy of a good vacuum seal. If you’re sealing something wet—like marinated meat or fresh vegetables—pat them dry first. Excess moisture can get pulled into the sealing strip and damage the device. It’s a simple step that makes a huge difference.
Using Non-Compatible Bags
Regular zip-lock bags don’t have the vacuum channels that the Anova Vacuum Sealer Pro needs to function properly. Using incompatible bags is frustrating and won’t give you the results you want. Stick with bags specifically designed for vacuum sealing.
Ignoring the Cooling Period
Some people try to seal multiple bags back-to-back without giving the device a break. The heating element needs time to cool slightly between uses. Running it continuously without rest can damage the device and reduce its lifespan. Give it 30 seconds to a minute between seals.
Attempting to Force the Lid Closed
The sealing strip lid should close easily and smoothly. If you’re experiencing resistance, stop and check what’s wrong. There might be a bag misaligned or debris in the way. Forcing it can damage the mechanism.
Pro Tips for Superior Sealing Results
Angle Your Bags Slightly
Here’s a trick that experienced users swear by: when you place your bag in the sealing channel, angle it slightly so the bottom of the bag sits just a bit lower than the top. This helps any remaining liquid drain away from the sealing strip, resulting in cleaner, more reliable seals every time.
Pre-Freeze Before Sealing
For items like berries or other foods that you want to preserve in their whole form, freeze them first, then seal them. The frozen structure resists vacuum compression better, and you’ll get perfect results. This is especially useful if you’re planning to seal items that are delicate or have high moisture content.
Create a Marinade Seal
Want to vacuum-seal a marinade without it getting pulled into your food during storage? Pour the marinade into a separate bag and seal it first. Then use that sealed marinade bag and your food bag together in your storage container. This keeps everything organized and prevents flavor transfer.
Batch Your Sealing
If you’re doing meal prep, set up all your bags first with all your food portions already measured and prepared. Then seal them in one session. This is more efficient than doing it randomly throughout the week, and it helps you