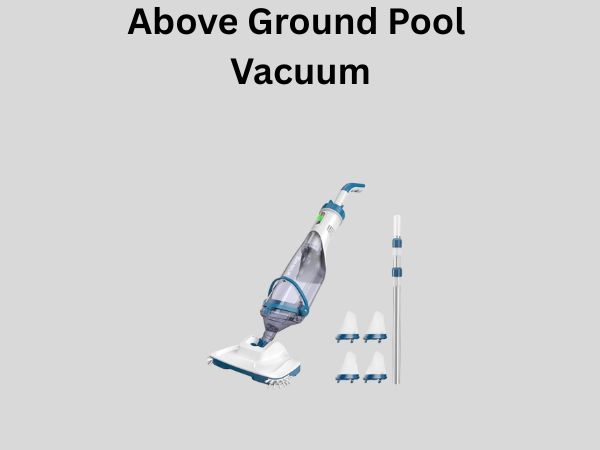
Above Ground Pool Vacuum: How to Use It Step by Step
Keeping your above ground pool crystal clear and inviting isn’t as complicated as you might think. One of the most essential tools you’ll ever invest in is an above ground pool vacuum. Whether you’re dealing with leaves, debris, or that stubborn algae growth at the bottom, knowing how to properly use a pool vacuum can save you hours of frustration and keep your water sparkling clean.
Think of your pool vacuum as the lungs of your swimming oasis—it breathes in all the nasty stuff your pool doesn’t want and expels it far away. But just like any powerful tool, you need to understand how it works before jumping in. Let me walk you through everything you need to know about using an above ground pool vacuum effectively.
Understanding Your Above Ground Pool Vacuum
Before we dive into the nitty-gritty of operation, let’s talk about what you’re actually working with. An above ground pool vacuum comes in different varieties, and understanding the type you own is crucial for proper use.
The Different Types of Pool Vacuums
You’ve got three main players in the pool vacuum game. First, there’s the manual vacuum—the classic choice that requires you to do the pushing. Then you’ve got automatic or robotic vacuums that essentially do their own thing once you set them loose. Finally, there are suction-side automatic cleaners that hook directly into your filtration system.
Each type operates differently, but they all share one common goal: removing debris and keeping your water pristine. The manual vacuum is like having a personal trainer for your pool maintenance—it requires effort, but you’re in complete control. The robotic vacuum is more like having a personal assistant that works while you relax with a cold drink.
Essential Components You Need to Know
Your vacuum setup typically includes several key parts working in harmony. You’ve got the vacuum head, which is the part that actually sucks up debris. Then there’s the pole that connects everything together, usually telescopic so you can reach different areas. The hose carries the water and debris, and finally, you’ve got a filter or collection bag that traps everything.
- Vacuum head or brush head
- Telescopic pole (typically 6 to 16 feet)
- Hose with proper diameter
- Skimmer basket or vacuum bag
- Hose adapter and clamps
Preparation: Getting Your Equipment Ready
You wouldn’t go into battle without checking your weapons first, right? The same applies to pool maintenance. Taking time to prepare properly makes the entire process smoother and more efficient.
Inspecting Your Vacuum Equipment
Start by examining every component of your vacuum system. Look for tears in the hose, cracks in the vacuum head, or debris stuck in the intake. A small hole in your hose is like a leak in your roof—it might seem minor, but it’ll cause bigger problems down the road. Run your hands along the hose length and listen for any hissing sounds that might indicate damage.
Check that your pole isn’t bent or damaged. The connection points should feel secure and tight. If anything seems loose or worn, now’s the time to replace it before you start vacuuming.
Cleaning Your Pool Filter
Here’s something many people overlook: your filter needs to be in top condition before you vacuum. If your filter is already clogged, your vacuum won’t work effectively. It’s like trying to breathe through a straw when you have a stuffy nose—frustrating and inefficient.
Check your filter pressure gauge. If the pressure reading is high, it’s time to backwash or clean your filter cartridge. Most filters show their optimal pressure range on the gauge itself. Getting this right ensures your vacuum will have maximum suction power.
Step-by-Step Guide to Using Your Manual Pool Vacuum
If you’re using a manual vacuum, follow these steps carefully for the best results. This is where the real action happens.
Step One: Assemble Your Vacuum System
Start by connecting your pole sections together. Most poles screw together easily—just make sure you twist them firmly but not obsessively. You’re aiming for snug, not stripped threads.
Next, attach the vacuum head to one end of the pole. This should feel secure and shouldn’t wiggle around. If it does, make sure you’ve threaded it completely.
Now comes the hose. Attach it to the vacuum head using the appropriate adapter. Some setups require clamps to keep everything in place, so use them if your equipment includes them.
Step Two: Prime Your Hose
This step is absolutely critical, and I can’t stress it enough. Your hose needs to be completely filled with water before you attach it to your filtration system. Why? Because air in the hose prevents proper suction, and you’ll be standing there wondering why your vacuum isn’t working.
Simply submerge the hose completely in your pool and let it fill naturally. You can hold it under the water or lay it along the bottom. Some people even manually push water through it to speed up the process. The moment water stops bubbling out, you’re ready to go.
Step Three: Connect to Your Skimmer or Return Line
This is where your vacuum actually powers up. You’ve got two main options here. Most people use the skimmer basket opening, which is simpler for above ground pools. Just remove your skimmer basket and connect your vacuum hose to the opening inside the skimmer.
Some setups allow you to connect to the pump’s return line instead, but that’s more common with in-ground pools. Stick with the skimmer method for simplicity if that’s available to you.
Step Four: Begin the Vacuuming Process
Now you’re actually vacuuming. Start by moving your pole slowly across the pool floor in overlapping strokes, like you’re mowing a lawn. The key word here is slowly. Rushing through this process just stirs up debris rather than sucking it up.
Work in a systematic pattern. Start at one end and methodically move across, then work your way to the other end. Think of it like vacuuming your living room—you wouldn’t just randomly wave the vacuum around.
Step Five: Watch Your Filter Pressure
Keep one eye on your filter pressure gauge while you’re working. If it climbs significantly higher than where you started, your filter is getting clogged with debris. This is actually normal and expected. When pressure rises about 8 to 10 PSI from the starting point, it’s time to stop and backwash your filter.
Don’t ignore this warning sign. A clogged filter reduces suction power dramatically and makes the whole job harder.
Step Six: Handle Problem Areas Carefully
Some spots in your pool are trickier than others. Deep corners, steps, and areas near the walls need extra attention. Slow down here and make multiple passes if needed. The deep end will require more patience since gravity isn’t helping you, but methodical effort will get the job done.
Special Techniques for Different Pool Conditions
Not every pool maintenance session is the same. Sometimes you’re dealing with unusual challenges that require adjusted techniques.
Dealing With Heavy Algae Blooms
When your pool looks more like a swamp than a swimming pool, you’ve got a serious algae situation. Vacuuming alone won’t solve this problem completely, but it’s an important part of the solution. The thing is, heavy algae settling on the bottom can clog your vacuum quickly.
Start by treating the water with appropriate algaecide according to the product instructions. Give it time to work and let the algae settle. Then, vacuum very slowly in short bursts, stopping frequently to check your filter pressure. You’ll likely need to backwash several times during this process.
Managing Leaves and Debris
If your pool is surrounded by trees, you might find yourself vacuuming leaves more often. Large debris should actually be skimmed out with a net before you vacuum. Trying to suck up whole leaves is like trying to drink a glass of water with a grain of sand in your mouth—not happening efficiently.
Remove what you can with a skimmer net first, then vacuum the finer debris and particles that have settled.
Vacuuming to Waste for Cloudy Water
Sometimes your filter is so overloaded that running debris through it just creates more cloudy water. In these situations, experienced pool owners use a bypass method that sends dirty water directly out of the pool without filtering it first. This requires a multiport or push-pull valve setup, which not all above ground pools have, but if yours does, it’s a game changer for serious cleaning situations.
Maintaining Your Vacuum Between Uses
Your vacuum is an investment, and like all investments, it needs proper care to provide returns over time.
Rinsing and Storage
After every use, rinse your vacuum head and hose with fresh water. This removes chlorine residue and any remaining debris. Let everything air dry completely before storing it away. A wet hose rolled up in a garage is basically a science experiment waiting to happen.
Store your equipment in a cool, shaded location. UV exposure degrades hoses and plastic components over time. If possible, hang your hose coiled rather than leaving it in a pile, which can create permanent creases.
Checking Hose Integrity
Every few months, inspect your entire hose for small cracks, holes, or deterioration. These issues only get worse and will eventually make your hose worthless. A quality pool hose should last several years with proper care, but nothing lasts forever in the harsh pool environment.
Troubleshooting Common Vacuum Problems
Even when you’re doing everything right, sometimes things don’t work as expected. Here’s what to do when problems arise.
Weak Suction Power
If your vacuum isn’t picking up debris effectively, start by checking your hose for air leaks. Re-prime it completely and make sure it’s firmly attached. Then check your filter pressure. A clogged filter is the number one culprit behind weak suction.
Next, examine your skimmer basket. If it’s full of debris, it’s restricting water flow. Empty it out and try again.
Hose Keeps Popping Off
This is frustrating but usually easy to fix. Make sure you’re using the correct hose diameter for your pump. Using a hose that’s too large or too small causes connection issues. The connections should be hand-tight, not over-torqued. If clamps are provided, use them.
Vacuum Gets Stuck on the Pool Bottom
Too much suction power can actually cause your vacuum to stick. If this happens, lift the pole to reduce suction momentarily, then try again with lighter pressure. Some people slightly open a drain plug or adjustment valve to reduce suction force.
When to Call a Professional
Knowing your limits is important. If your pump isn’t priming properly, your filter has internal issues, or your pool equipment is acting strangely, it’s time to consult a professional. Pool systems can be complex, and some problems require expert diagnosis.
Conclusion
Learning to use an above ground pool vacuum properly transforms pool maintenance from an intimidating mystery into a straightforward task. You now understand the different types of vacuums available, how to prepare your equipment, follow a systematic cleaning process, and troubleshoot common problems. Regular vacuuming keeps your water clean, extends your equipment’s life, and makes your entire pool experience more enjoyable. Remember that consistency matters more than intensity—vacuuming your pool once a week prevents buildup better than sporadic deep cleaning sessions. With the knowledge you’ve gained here, you’re well-equipped to maintain a sparkling clean pool that you and your family can enjoy all season long.
Frequently Asked Questions
How often should I vacuum my above ground pool?
Most pools benefit from vacuuming once per week during regular use. However, if your pool is surrounded by trees or in a dusty environment, you might need to vacuum two to three times weekly. During heavy algae blooms or after storms, daily vacuuming might be necessary until the water clears.
Can I use a regular shop vacuum for my pool?
While some people attempt this, it’s not recommended. Regular shop vacuums aren’t designed to handle water continuously and can be damaged by pool chemicals. Additionally, they don’t create the proper pressure differential needed for effective pool cleaning. Stick with equipment specifically designed for pools.
What’s the difference between vacuuming to filter and vacuuming to waste?
Vacuuming to filter sends dirty water through your filter, cleaning both the pool and capturing debris. Vacuuming to waste bypasses the filter entirely and sends dirty water out of the pool. Use the waste method when your filter is already overloaded or when dealing with heavy algae, as filtering heavily contaminated water through a clogged filter is counterproductive.
Why is my pool vacuum making a loud noise?
Unusual noises typically indicate air leaks in your hose or connection points. Check every junction carefully and ensure your hose is properly primed. If noises persist, you might have cavitation in your pump, which means air is getting into your system. This requires professional attention if you can’t locate the source.
How long does it take to vacuum an above ground pool?
A typical above ground pool takes 30 to 45 minutes to vacuum thoroughly, depending on pool size and debris levels. A heavily soiled pool might take an hour or more. Remember that speed isn’t the goal—thorough, slow movements ensure better debris pickup than rushing through the process.
“`