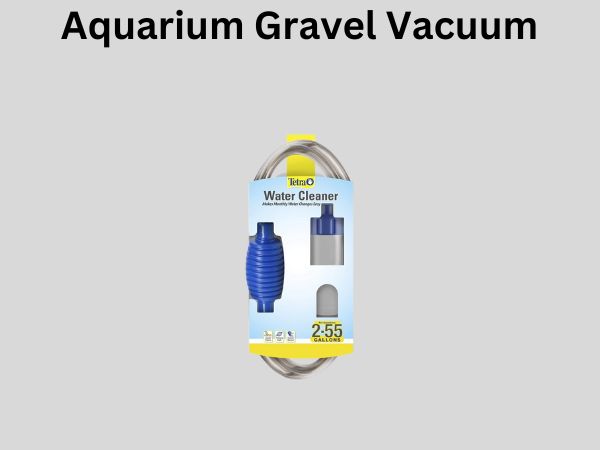
Aquarium Gravel Vacuum: How to Use It Without Harming Your Fish
If you’ve ever looked into your aquarium and noticed the water becoming cloudier by the week, or spotted dark patches of debris settling between your gravel, then you’ve encountered one of the most common challenges aquarium owners face. Keeping your tank clean isn’t just about aesthetics—it’s about maintaining a healthy environment where your fish can truly thrive. That’s where an aquarium gravel vacuum comes into play, and honestly, it’s one of the best investments you can make for your underwater companions.
But here’s the thing: many people either avoid using a gravel vacuum altogether because they’re worried about disturbing their fish, or they use it incorrectly and end up creating more problems than solutions. I’m going to walk you through everything you need to know about using this essential tool the right way.
Understanding What a Gravel Vacuum Actually Does
Think of a gravel vacuum like a tiny underwater cleaning crew that sucks up all the nasty stuff hiding in your substrate. It’s not just removing visible debris—it’s pulling out excess food, fish waste, and organic matter that would otherwise decompose and pollute your water. This buildup is like letting garbage pile up in your house; eventually, the smell becomes unbearable, and the whole environment becomes unhealthy.
A gravel vacuum works by creating suction that pulls water and debris up through a tube and into a bucket or waste container. The water gets dirty, yes, but the gravel stays mostly in place (or returns to the tank through some designs), and the crud gets removed. It’s a simple concept that produces remarkable results for water quality.
The Different Types of Gravel Vacuums Available
Siphon-Style Vacuums
These are the traditional models that rely on gravity and siphon action. You fill the tube with water, cover the ends, and when you release it over your gravel, the siphon does the work. They’re affordable and require no electricity, making them popular for small to medium tanks.
Electric Gravel Vacuums
Battery-operated or plug-in versions make the job easier because you don’t have to manually create the siphon. Just turn them on, and they start pulling debris. These work wonderfully if you have mobility issues or simply prefer less manual effort.
Aquarium Vacuum Cleaners with Pre-filters
Some advanced models include intake strainers that prevent you from accidentally vacuuming up small fish or fry. If you’re keeping delicate species, these are worth considering.
Preparing Your Aquarium Before You Start
Why Preparation Matters
Jumping straight into vacuuming without preparing is like running into battle without a plan. You’ll cause unnecessary stress to your fish and might miss important spots. Let me break down what preparation really means.
Check Your Equipment
Before you even think about touching your tank, make sure your vacuum is clean and in working condition. If you used it last month, there might be algae or debris stuck inside the tubes. Run some clean water through it, and test that the siphon works properly if you’re using a manual model. A faulty vacuum is worse than no vacuum at all.
Gather Your Supplies
You’ll need several things within arm’s reach:
- Your gravel vacuum (obviously)
- A bucket or waste container large enough to handle the water volume you’re removing
- A second bucket with freshwater at the same temperature as your tank
- A thermometer to verify water temperature
- A net to catch any fish that might get too close
- Towels for inevitable spills
Don’t Feed Your Fish Right Before
Fish are more active and excited right after eating, which means they’ll be all over your workspace. Ideally, vacuum your tank either before feeding or at least an hour after. This gives your fish time to settle and reduces the chances of them getting startled or injured.
Step-by-Step Guide to Vacuuming Your Gravel Correctly
Step 1: Reduce Tank Lighting
Dimming the lights or turning them off temporarily helps calm your fish. Sudden activity in a brightly lit tank can trigger stress responses. It’s a small detail, but it makes a noticeable difference in how your fish react to the process.
Step 2: Position Your Bucket Correctly
Place your waste bucket below the tank level. If you’re using a siphon-style vacuum, the bucket needs to be lower than your gravel line to create proper siphon action. For electric models, position it conveniently nearby where you can safely reach it.
Step 3: Insert the Tube Gently into the Gravel
Here’s where many people go wrong. They plunge the vacuum tube straight down like they’re stabbing the substrate. Instead, insert it at an angle and move it slowly. The gravel doesn’t need to be aggressively pushed around—gentle movement is more than sufficient. The suction does the heavy lifting; your hands are just guides.
Step 4: Work in Sections
Don’t try to vacuum your entire tank in one sweep. Divide it into sections and spend about 30 seconds in each area. This approach ensures thorough cleaning without exhausting yourself or your fish. Start from one corner and work systematically around the tank.
Step 5: Create Controlled Suction
If you’re using a siphon model, start the siphon action by filling the tube with water from the tank first, then placing your thumb over the opening. As you position it over the gravel, release your thumb slightly to control the suction strength. Think of it like adjusting a vacuum cleaner’s power setting—more suction isn’t always better.
Step 6: Watch for Fish and Decorations
Keep your eyes on the tube opening at all times. If a fish swims near it, immediately reduce suction or reposition. The same goes for decorations that might get sucked in. Your awareness is your fish’s safety net.
Step 7: Remove Only What You Need
The goal is to remove about 20 to 30 percent of your tank water during a standard cleaning. This amount removes waste while preserving the beneficial bacteria colonies in your substrate. Removing too much water forces you to add excessive fresh water, which can disrupt the nitrogen cycle.
Critical Safety Tips to Protect Your Fish
Never Rush the Process
I can’t stress this enough. A five-minute careful vacuum session is infinitely better than a two-minute hurried one. Your fish’s wellbeing depends on your patience and attention to detail.
Avoid Vacuuming Around Live Plants
If you have rooted plants, vacuum around them rather than directly over them. The suction can uproot delicate plants or damage their leaves. Think of the plants as sleeping babies—you don’t want to disturb them unnecessarily.
Use a Pre-filter if You Have Fry or Small Fish
Young fish or small species like tetras are vulnerable to getting sucked up. Many quality vacuums offer pre-filter attachments that prevent this tragedy. It’s a small investment that provides immense peace of mind.
Don’t Vacuum Hiding Spots Where Fish Sleep
If your fish have favorite caves or plants where they hide at night, avoid vacuuming those areas during their rest period. Disturbing sleeping fish causes stress and can weaken their immune systems over time.
Water Temperature and Chemistry Considerations
Match the Temperature of Replacement Water
This is absolutely crucial and often overlooked. If your tank is at 78 degrees and you add water that’s 65 degrees, your fish experience a shock similar to jumping from a warm shower into an ice bath. Use a thermometer to ensure your replacement water is within one to two degrees of your tank temperature.
Let Replacement Water Dechlorinate First
If you’re using tap water, it likely contains chlorine or chloramine to make it safe for humans. These chemicals are harmful to fish and beneficial bacteria. Either let the water sit for 24 hours before using it, or add a dechlorinating agent. Many aquarists keep a separate bucket of water aging for their next cleaning session.
Consider Your Fish’s Sensitivity
Some fish species are more sensitive to water changes than others. Discus fish, for example, are notoriously particular. If you’re keeping sensitive species, make your water changes smaller and more frequent rather than large and infrequent.
How Often Should You Vacuum Your Gravel?
Standard Aquariums
Most established tanks benefit from vacuuming once a week during a water change. This frequency keeps waste under control without disrupting the bacterial balance that’s essential for a healthy ecosystem.
Heavily Stocked Tanks
If you’re keeping many fish or particularly messy eaters, you might need to vacuum twice weekly. Watch for signs of water quality deterioration like cloudy water or algae blooms. These are your tank’s way of saying it needs more frequent attention.
New Tanks
For tanks less than three months old, use gentler suction and avoid disturbing the gravel too much. You’re trying to preserve the developing bacterial colonies that are still establishing themselves.
Common Mistakes People Make With Gravel Vacuums
Mistake 1: Using Excessive Suction
More power doesn’t equal better cleaning. Heavy suction can damage plants, stress fish, and create unnecessary turbulence. Moderate, controlled suction is your best friend.
Mistake 2: Vacuuming Too Frequently
Over-vacuuming removes beneficial bacteria and destabilizes your tank’s ecosystem. Once a week is usually sufficient unless you’re dealing with specific problems.
Mistake 3: Removing Too Much Water
Taking out more than 30 percent of your water forces you to add fresh water that hasn’t aged. This disrupts pH balance and can cause algae blooms. Conservative is better than aggressive when it comes to water removal.
Mistake 4: Vacuuming Without Testing Equipment
You can’t know if your vacuuming frequency is appropriate unless you’re testing water parameters regularly. Invest in a basic test kit to monitor ammonia, nitrite, nitrate, and pH.
Advanced Techniques for Experienced Aquarists
The Spot-Cleaning Method
Instead of vacuuming the entire substrate weekly, some experienced keepers spot-clean only the dirtiest areas two or three times a week. This preserves beneficial bacteria better than full vacuuming. It’s like doing light dusting instead of deep cleaning every time.
Angled Vacuuming for Planted Tanks
Inserting your vacuum tube at a 45-degree angle, rather than straight down, creates less disturbance to plants and allows you to target debris in tight spaces more effectively.
Using Your Vacuum for Water Changes
Some advanced keepers use the vacuum process itself as their water change method. You remove the dirty water through vacuuming, then refill with fresh water of the same temperature and chemistry. It’s efficient and thorough when done correctly.
What to Do If Something Goes Wrong
If You Accidentally Vacuum a Fish
Don’t panic. Immediately stop the vacuum and gently release the fish back into the tank. Most fish recover quickly from this scare. However, if your fish shows signs of injury or becomes lethargic, monitor it closely and consider doing a large water change to reduce stress hormones in the tank.
If Your Fish Are Acting Stressed After Vacuuming
This sometimes happens, especially with sensitive species. Reduce feeding for a day, keep lights dimmed, and avoid additional disturbances. Sometimes fish just need time to recover from the excitement. If stress behaviors persist for more than a few hours, test your water parameters immediately.
If Your Gravel Vacuum Isn’t Working Properly
Clean the tubes thoroughly. Air locks in siphon-style vacuums are common culprits. Make sure you’re filling the tube completely with water before starting the siphon. If an electric model isn’t working, check the battery or power connection, and verify that the intake isn’t clogged with debris.
Conclusion
Using an aquarium gravel vacuum doesn’t have to be intimidating or harmful to your fish. It’s actually one of the most straightforward and beneficial maintenance tasks you can perform. By understanding how your vacuum works, preparing properly, moving slowly and deliberately, and respecting your fish’s space, you’ll maintain a clean, healthy tank that your aquatic pets will appreciate.
The key is consistency and gentleness. Weekly vacuuming with proper technique keeps waste at bay, maintains your nitrogen cycle, and gives your fish the healthiest possible environment. Remember that your vacuum is a tool for preservation, not just cleaning. You’re not trying to create a spotless aquarium—you’re trying to create a stable, thriving ecosystem where your fish can live long, healthy lives.
Start with these guidelines, observe how your fish react, and adjust your technique based on what you learn about your specific setup. Every tank is unique, and the best aquarists are those who pay attention, remain patient, and continuously refine their methods. Your fish will reward your care with vibrant colors, active behavior, and the kind of vitality that comes from living in a well-maintained environment.
Frequently Asked Questions
Can I use a gravel vacuum in a tank with small fry or young fish?
Yes, but with caution and the right equipment. Purchase a vacuum with a pre-filter or intake strainer attachment that prevents small fish from being sucked up. Alternatively, use a siphon-style vacuum with very low suction power. You can create lower suction by holding the output tube higher than the tank, reducing the pressure difference. Always keep a close eye on the intake area and reposition immediately if a small fish approaches.
What’s the difference between vacuuming gravel and using a water change system?
A gravel vacuum combines cleaning and water removal into one process. Water change systems specifically designed for aquariums often have finer control over water flow and may include heating or cooling capabilities. However, a gravel vacuum accomplishes the same basic function at a lower cost. Both methods remove water and waste; the vacuum just does both simultaneously.
Is it possible to over-clean your aquarium substrate?
Absolutely. Over-cleaning removes beneficial bacteria that break down fish waste. If you vacuum more than twice weekly on a standard tank, you risk destabilizing your nitrogen cycle. You might notice ammonia or nitrite spikes, algae blooms, or cloudy water. Once weekly vacuuming is ideal for most situations. Only increase frequency if test results show problem levels of waste accumulation.
Can I vacuum my substrate without doing a water change?
Technically yes, but it’s not
![7 Best Canister Vacuum Under $500 [2026]](https://neatixo.com/wp-content/uploads/2026/05/7-best-canister-vacuum-under-500-2026-featured-768x432.jpg)