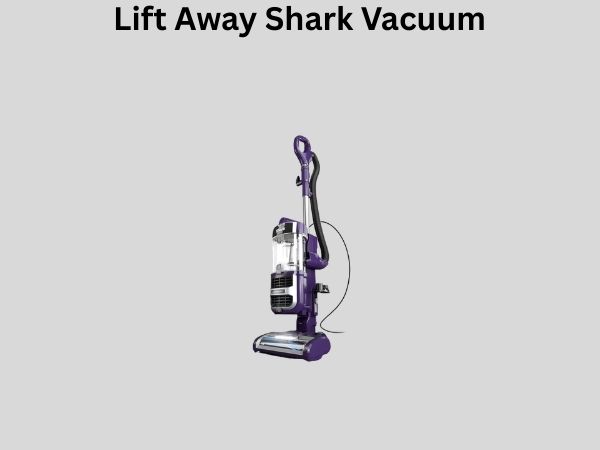
Lift Away Shark Vacuum: How to Use It for Hard-to-Reach Areas Like a Pro
You know that feeling when you’re vacuuming and you spot dust on top of your ceiling fan, cobwebs in the corner of your stairwell, or crumbs nestled between your couch cushions? It’s frustrating, right? Traditional vacuums leave you standing on tippy-toes, contorting your body in awkward positions, or worse—giving up entirely. But what if I told you there’s a smarter way?
That’s where the Lift Away Shark vacuum comes in. This innovative cleaning machine has changed the game for thousands of households, and once you understand how to use it properly, you’ll wonder how you ever cleaned without it. Today, I’m going to walk you through everything you need to know to become a Lift Away Shark vacuum expert.
Understanding Your Lift Away Shark Vacuum: What Makes It Special
Before we dive into the how-to, let’s talk about what makes the Lift Away Shark vacuum different from your average cleaning tool. The genius behind this design is in its name—it lifts away. The main canister separates from the base unit with a simple press of a button, transforming your upright vacuum into a portable handheld machine in seconds.
Think of it like having two vacuums in one. You get the power and efficiency of a full-sized upright for your floors, plus the flexibility of a lightweight handheld for those awkward spots. This dual-functionality means you’re investing in a complete cleaning solution rather than buying multiple machines.
The Components You Need to Know About
To use your Lift Away Shark effectively, you should become familiar with each component. The base unit stays on the floor and handles your carpets and hard floors. The lift-away canister is the detachable top portion that contains your dust collection bin. The power cord, motor, and wheels are part of the base unit, providing stability and maneuverability. There’s also a dust cup, filters, brush rolls, and various attachments that make cleaning different surfaces a breeze.
Getting Started: Initial Setup and Safety Checks
When you first unbox your Lift Away Shark vacuum, don’t rush. Take time to set it up properly. Start by reading the manual—I know, not the most exciting task, but it’ll save you headaches down the road. Check that all parts are included and undamaged.
Assembly Requirements
Most Lift Away models arrive partially assembled, which is convenient. You’ll typically need to:
- Attach the handle to the main unit if it’s not already connected
- Ensure the dust cup is properly inserted into the canister
- Check that all attachments are accounted for
- Inspect the power cord for any damage before plugging it in
- Confirm that wheels rotate freely and aren’t stuck with packaging material
Pre-Cleaning Safety Checks
Before your first use, do a quick safety inspection. Make sure the power cord isn’t frayed or damaged. Check that the vacuum is on a stable surface and won’t tip over. Ensure the dust cup is properly installed—this prevents air leaks and maintains suction. It’s also a good idea to empty the dust cup before you start, even though it’s new.
How to Lift Away Your Shark Vacuum Canister
This is the star feature, so let’s master it. The lift-away mechanism is designed to be intuitive, but there’s definitely a right way and a wrong way to do it.
The Proper Technique for Separation
Stand behind your vacuum in a comfortable position. Locate the release button—on most models, it’s on the handle or near the top of the unit. Press this button firmly while simultaneously pulling the canister away from the base unit. You should feel a satisfying click or hear a subtle pop as it detaches. Don’t yank forcefully; let the mechanism do its work. The canister should come away smoothly and cleanly.
If you’re having trouble separating the two parts, don’t panic. Sometimes there’s slight resistance from the suction seal. Try pressing the release button again while gently wiggling the canister. Make sure you’re not pressing the wrong button—some models have multiple buttons for different functions.
Reattaching the Canister Properly
When you’re ready to reattach, align the canister with the base unit and slide it back on. You’ll hear or feel a click when it’s properly seated. Don’t force it—if it doesn’t slide smoothly, check the alignment and try again. A properly attached canister is crucial for maintaining suction power throughout your cleaning session.
Mastering Hard-to-Reach Areas: The Handheld Advantage
Now we’re getting to the real magic. Once you’ve lifted away your canister, you have a portable vacuum that can go where traditional uprights can’t.
Cleaning Above Head Level
Want to get those ceiling fans without standing on a ladder? With the canister in handheld mode, you can reach up and clean fan blades, light fixtures, and high shelves safely. Hold the handheld unit with both hands for better control and stability. Use short, deliberate strokes rather than aggressive scrubbing motions. This gives you better accuracy and reduces arm fatigue.
Tackling Stairs with Confidence
Stairs are one of those areas where most people struggle. With a Lift Away Shark, you simply detach the canister and work your way up or down the staircase. Start at the bottom and work upward, or begin at the top—whatever feels more natural to you. The handheld design lets you position the suction head perpendicular to each step for maximum debris collection. No more pushing a bulky upright up and down stairs.
Reaching Between Furniture
That narrow gap between your couch and the wall? The handheld canister fits right in. Cushions and upholstered furniture are much easier to clean with the detached head. You can also reach under furniture without that awkward bending and stretching. Just make sure you’re using the appropriate attachment for upholstered surfaces to avoid damaging the fabric.
Car Interior Cleaning
The handheld mode is perfect for vacuuming your car’s interior. Detach the canister, grab the appropriate attachment, and you’ve got a portable cleaning solution. Clean under the seats, around the car seats if you have kids, and even the trunk. The lighter weight makes it much more manageable than hauling a full upright vacuum to your garage or driveway.
Using Attachments and Accessories Effectively
Your Lift Away Shark comes with several attachments, and knowing when to use each one is key to effective cleaning.
The Crevice Tool
This long, narrow attachment is your best friend for tight spaces. Use it along baseboards, in corners, between couch cushions, and along window sills. The thin design lets you slide it into spaces where the main brush head can’t reach. For best results, keep a firm grip on the tool and use steady pressure rather than jabbing motions.
The Upholstery Brush
Furniture, drapes, and lampshades benefit from this softer attachment. It’s gentler than the main brush roll and won’t damage delicate fabrics. Use it with a light touch—you’re not trying to scrub the fabric, but rather lift dust and debris from the surface. This attachment is also great for cleaning pet hair from furniture.
The Dusting Brush
Ceiling fans, blinds, and decorative items need the dusting brush. It’s smaller and more precise than other attachments, allowing you to navigate around objects without accidentally bumping or knocking things over. Use gentle, sweeping motions to avoid scattering dust.
The Pet Hair Tool (If Included)
Pet owners will appreciate this specialized attachment. It’s designed specifically to grab stubborn animal hair from furniture and rugs. Use it with short, quick motions to lift embedded hair effectively.
Floor Cleaning: Making the Most of Your Upright Vacuum
Don’t forget that when the canister is attached to the base, you’ve still got a powerful upright vacuum perfect for regular floor cleaning.
Carpet Cleaning Best Practices
For carpeted areas, make sure the brush roll is engaged. You should feel slight resistance as you push the vacuum across the carpet. Move slowly enough that the brush roll has time to agitate the fibers and pull up embedded dirt. Multiple passes over heavily soiled areas will improve cleaning results. Think of it like brushing your hair—one stroke doesn’t remove all the tangles.
Hard Floor Techniques
Hard floors require a different approach. Most Lift Away models have a switch or button that disengages the brush roll, preventing it from scattering small debris. When cleaning hard floors, move at a moderate pace and use short strokes. The suction alone handles most debris, and the brush roll would do more harm than good by kicking particles around.
Managing Transitions Between Floor Types
If your home has both carpets and hard floors, you’ll need to toggle between settings. Take time to adjust the brush roll engagement as you move between different flooring types. This small adjustment makes a significant difference in cleaning effectiveness and prevents unnecessary dust clouds.
Maintenance and Care for Longevity
Your Lift Away Shark will serve you well if you treat it right. Regular maintenance keeps the suction strong and the machine running smoothly.
Emptying the Dust Cup Correctly
Never let your dust cup get completely full—empty it when it reaches about three-quarters capacity. To empty, unlatch the dust cup from the canister and hold it over a trash bin. Press the release button and the bottom lid opens, letting debris fall into the trash. Tap the cup gently to dislodge any clinging dust. This ensures consistent suction throughout your cleaning sessions.
Filter Care and Cleaning
Your vacuum has filters that need regular attention. Check them monthly and clean them according to the manufacturer’s instructions, typically by gently tapping them over a trash can or rinsing with cool water. Replace filters annually or when they show signs of damage. Dirty filters reduce suction power dramatically, so this is crucial maintenance.
Brush Roll Inspection
Inspect the brush roll regularly for wrapped hair and string. Turn off the vacuum, and use scissors or your fingers to carefully remove any tangled debris. A clean brush roll maintains optimal cleaning performance and extends the machine’s lifespan. Most people overlook this simple maintenance task, but it makes a world of difference.
Power Cord Safety
Store the power cord properly to prevent damage. Coil it loosely rather than wrapping it tightly around the machine, which can fray the insulation over time. Check the cord regularly for cuts or exposed wiring. A damaged cord is a safety hazard and should be replaced immediately.
Troubleshooting Common Issues
Sometimes things don’t go perfectly. Here’s how to tackle common problems.
Loss of Suction
If you notice weaker suction, first check the dust cup—it’s usually the culprit. Empty it completely and check the filters. A clogged filter drastically reduces suction. Clean or replace filters as needed. Also, verify that the canister is properly attached to the base unit. A loose connection creates air leaks that diminish suction power significantly.
Difficulty Detaching the Canister
If the lift-away mechanism seems stuck, make sure the brush roll is off and the vacuum is unplugged. Sometimes debris interferes with the release mechanism. Gently wiggle the canister while pressing the release button. Never force it, as you could damage the attachment points.
Unusual Noises
Strange sounds often indicate something is wrapped around the brush roll or stuck in the suction pathway. Turn off the vacuum immediately and inspect the brush roll and intake areas. Remove any foreign objects you find. If noise persists after cleaning, consult the manual or contact customer service.
Pro Tips for Maximum Cleaning Power
Now that you understand the basics, here are some expert tricks to elevate your cleaning game.
Pre-Cleaning Preparation
Before vacuuming, do a quick pick-up of large items and toys. This prevents clogs and allows the vacuum to work more efficiently. Moving small furniture and decluttering also means you spend less time vacuuming and more time enjoying your clean home.
Optimal Technique for Different Situations
When using the handheld canister, angle it toward the debris source rather than away from it. Move methodically through each area rather than randomly, ensuring you cover the entire space. For upstairs handheld use, work systematically from one end of the room to the other.
Switching Between Functions Seamlessly
Develop a routine that minimizes the time spent switching between attached and detached modes. For example, vacuum all carpeted areas first with the full upright, then detach and handle stairs and hard-to-reach spots. This workflow is more efficient than constantly switching modes.
Conclusion
The Lift Away Shark vacuum represents a genuine leap forward in home cleaning technology. What makes it special isn’t just the innovative design, but how that design translates into real-world convenience. You’re no longer limited by the constraints of traditional vacuums. Whether you’re cleaning ceiling fans, tackling narrow staircases, refreshing your car interior, or reaching into tight corners, this machine rises to the occasion.
The key to mastering your Lift Away Shark is understanding each component and knowing which mode to use for different situations. Practice the attachment and detachment process until it becomes second nature. Pay attention to maintenance because a well-maintained vacuum performs dramatically better than a neglected one. Most importantly, take advantage of those hard-to-reach areas that you’ve been avoiding. With your Lift Away Shark in hand, they’re no longer obstacles—they’re opportunities to maintain a truly clean home.
Your cleaning routine will transform once you fully embrace what this vacuum can do. What seemed impossible before—reaching that cobweb in the corner or vacuuming the inside of your car—becomes quick and easy. That’s the promise of the Lift Away Shark, and it’s a promise it genuinely delivers on.
Frequently Asked Questions
How do I know if my Shark vacuum canister is properly attached?
When the canister is properly seated on the base unit, you should hear a distinct clicking sound and feel a firm connection. The canister shouldn’t wiggle or move if you gently try to shift it side to side. If you have any doubt, try pulling upward—it shouldn’t come away easily. A properly attached canister is essential for maintaining suction power, so if you’re unsure, detach and reattach it until you feel confident in the connection.
Can I use the handheld canister on wet surfaces?
Most standard Shark Lift Away models are designed for dry debris only. Never use your handheld canister on wet surfaces like spilled liquid, wet carpets, or outdoor areas with moisture. The electrical components aren’t waterproof, and introducing moisture could damage the motor or create a safety hazard. If you need to clean up liquid spills, always allow the area to dry completely before vacuuming, or use a wet-dry vacuum designed for that purpose.